Reviewed 26 October 2026
Inkhead Beginner Guide: Hub, Difficulty & First Clear
Find the hub tools, understand Casual, Regular and Expert, and choose a practical first-clear route in Inkhead.
§Read the hub before entering a fight#
The recorded hub groups Menu, Wardrobe and Store on the left. Map and Party are on the right. A Peas & Perks shop sign is visible beyond the central fountain. Use the labelled destinations to find a system before spending currency.
Keyboard labels are visible beside several hub actions: P for Menu, M for Map and G for Party. Use the on-screen buttons if your platform or key bindings differ.

§Casual, Regular and Expert are different goals#
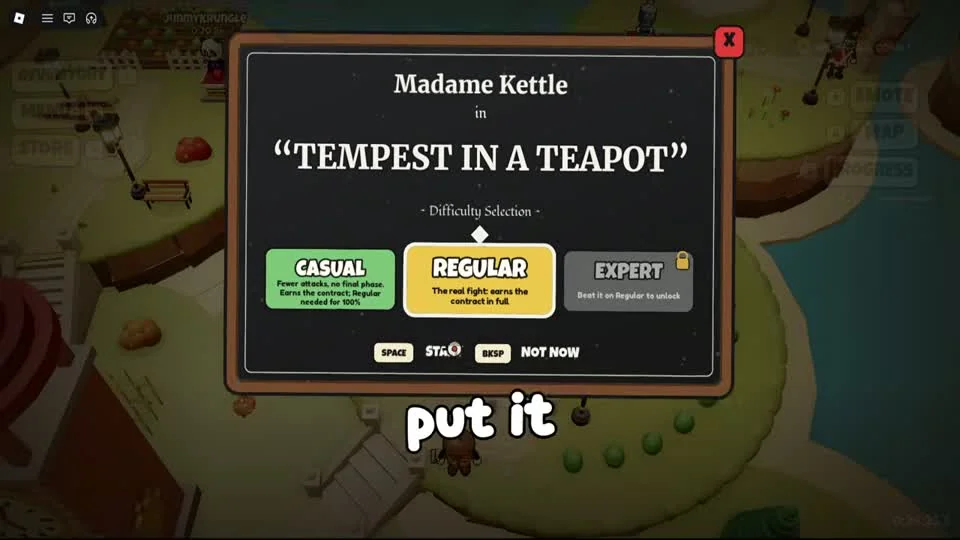
Madame Kettle’s recorded difficulty panel describes Casual as having fewer attacks and no final phase. It says Casual earns the contract, while Regular is needed for 100%. Regular is described as the real fight and earns the contract in full.
Expert is locked on that panel and says to beat Regular to unlock it. Treat this as the observed requirement for that boss. Choose Casual while learning the movement, then return to Regular to practise the complete encounter.
§Turn a failed attempt into one useful change#
Watch which lane or height caused the hit. On the next attempt, change that movement decision before changing your entire setup. If an early jump lands you inside another hazard, try waiting until the attack occupies its lane before leaving the floor.
When playing co-op, agree on the boss and difficulty first. The official description supports co-op, but we have not verified damage scaling, player limits inside a fight or revival rules. Do not plan around an assumed scaling bonus.